

Use Tripo in Codex
Talk to Codex the way you talk to a person. Ask for a 3D model; the Tripo 3D plugin generates it and saves the file into your project. You do not need to know APIs, terminals, or 3D software.
This is a start-from-zero walkthrough. Do the steps in order. If one step fails, fix it before going on.
What you need
- A computer (Mac or Windows).
- Codex — OpenAI’s coding assistant. It lives in the ChatGPT desktop app or the Codex CLI. It is not a normal ChatGPT chat window.
- Node.js 20 or later. The plugin uses it in the background. You will not write any Node code.
- A Tripo account. New accounts receive free credits. Create one at developers.tripo3d.ai if you do not have one.
Check Node.js. Open Terminal (Mac) or PowerShell (Windows) and run:
node -v
You should see a number like v20.11.0 or higher. If the command is not found, install the LTS version from nodejs.org, then close and reopen the terminal and try again.
Installing the plugin and signing in are free. Generating a model spends Tripo credits.
Step 1. Open Codex, not ChatGPT chat
This is the most common mistake.
- Open the ChatGPT desktop app (or the Codex CLI).
- Switch to Codex.
- Open the folder where you want the 3D files to appear. If you do not have a project yet, create an empty folder and open that.
If you stay in a normal ChatGPT conversation, the Tripo plugin will not load. That is expected: this plugin only works in Codex.
Step 2. Install the Tripo 3D plugin
- In Codex, open Plugins.
- Open the Plugins Directory.
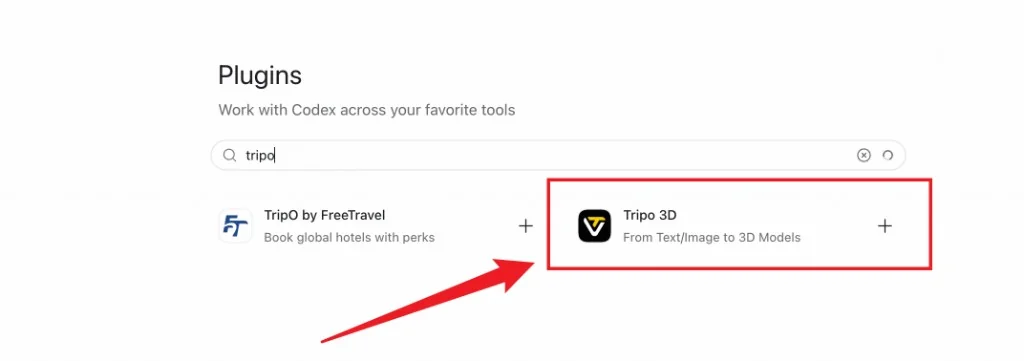
- Search for Tripo 3D.
- Install it, then confirm it is enabled.
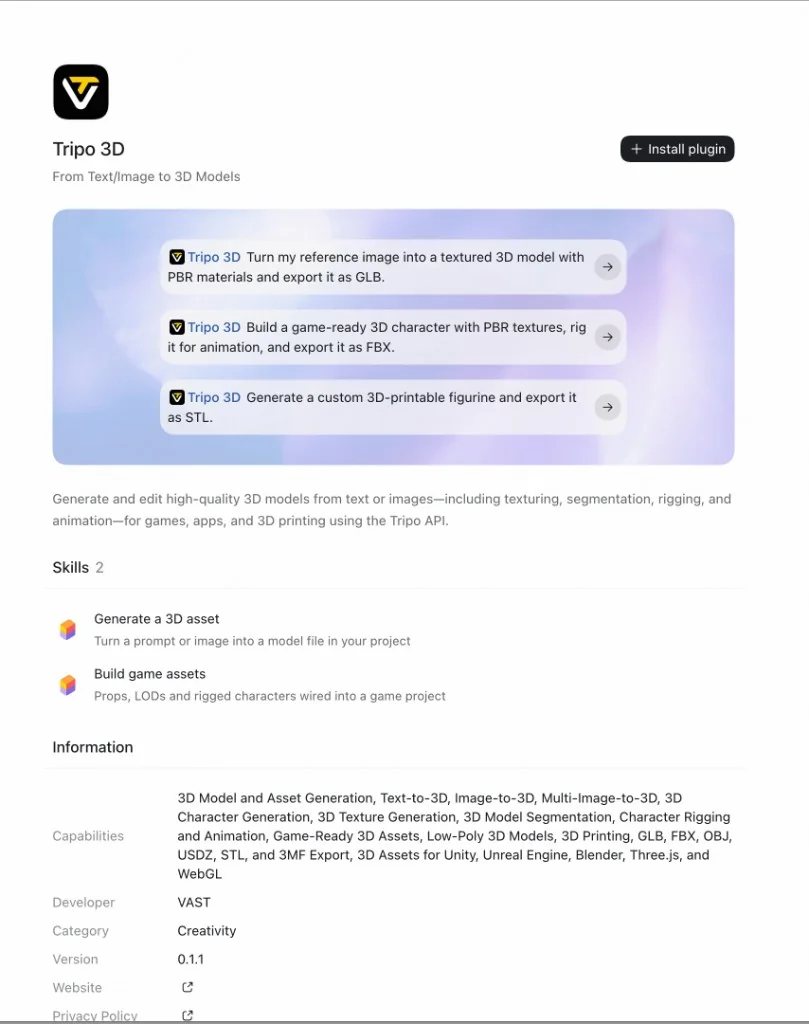
After a successful install you should see two capabilities: generate a 3D asset, and build game-ready assets. You do not need to turn them on one by one — keep the plugin enabled.
Trouble? You cannot find Tripo 3D
- Confirm you are in Codex, not ChatGPT chat.
- Quit the ChatGPT desktop app completely and open it again, then search once more.
- If it still does not appear, use Tripo CLI instead. It is the same generation engine, driven from the terminal.
Step 3. Send your first message
Copy the whole block below and paste it into Codex:
I want a low-poly treasure chest with textures. Save the GLB file in the ./assets folder.
If Tripo is not set up yet, walk me through every step like I have never used it.
Do not ask me to paste an API key into the chat.
Press send. Codex should now:
- Check whether Tripo is ready on your computer.
- If you are not signed in, show a verification URL and a one-time code.
- Wait while you finish sign-in in the browser.
- Generate the model and write it into
./assets.
Never paste an API key into the chat. The plugin does not need you to do that. If Codex asks for a key, reply: Sign in with the browser instead. Do not ask me for a key.
Step 4. Sign in in the browser (first time only)
When Codex shows a URL and a code, complete these clicks yourself. Leave Codex running — do not stop it.
- Open the verification URL in your browser.
- If the page asks you to sign in, sign in or create an account at developers.tripo3d.ai, then return to the verification page.
- Type the one-time code into the Verification code field. Check that it matches the code in Codex exactly.
- If your account already has API keys, pick any one of them. If you have none, one is created for you — there is nothing to choose.
- Click Authorize.
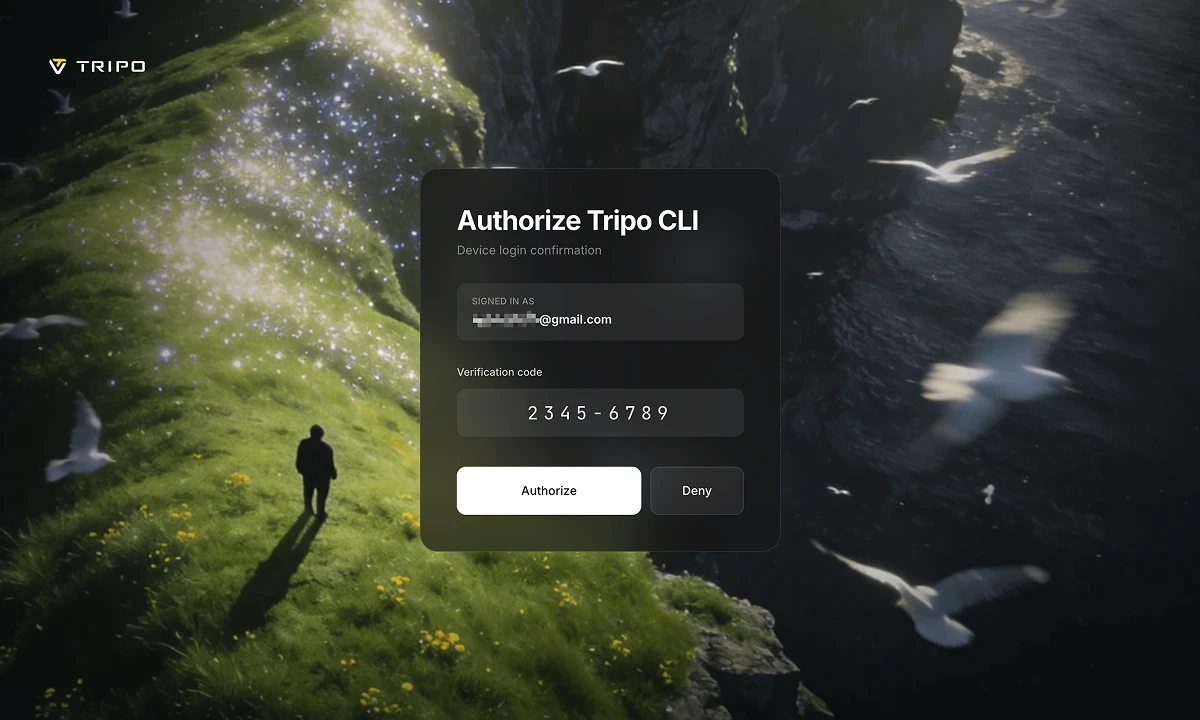
When authorization succeeds, Codex continues by itself. You should not copy anything back into the chat.
The code expires after a while. If it fails, ask Codex: Please sign in to Tripo again.
Trouble? The browser did not open, or sign-in did not finish
- Copy the URL from Codex and paste it into the browser yourself.
- The code in the page must match the code in Codex. If you are unsure, ask Codex to sign in again for a fresh code.
- Keep Codex waiting. Sign-in can take several minutes; stopping it early throws the code away.
Step 5. Wait, then open the files
Keep Codex open. The first generation often takes a few minutes. Codex is waiting for Tripo to finish — that is normal, not a freeze.
When it is done, Codex should:
- Tell you where the files were saved (usually under
./assets) - Mention how many credits were used
- Look at a preview image if one was generated
Open that folder. You typically get:
- A model file such as
model.glb preview.png— a picture of the modeltask.json— a record of the job
If the preview is not what you asked for, tell Codex: That is not what I wanted. Try again with a new seed.
What to say next
Use ordinary language. These are ready to copy.
Turn an image into 3D (put concept.png in your project folder first):
Turn concept.png into a 3D model and save it in ./assets.
Continue from the last model (does not generate from scratch — cheaper):
From the last model, make a 1500-face LOD and save it in ./assets.
Game props, then wire them into code:
Make three placeholder props for my scene as GLB files in ./assets, then load them in the project code.
If you ask for several models at once, Codex should ask you to confirm before spending credits. That is working as designed.
If something goes wrong
| What you see | What to do |
|---|---|
| The plugin does not appear | You are in ChatGPT chat. Switch to Codex. |
| Codex asks you to paste an API key | Refuse. Say: Sign in with the browser. Do not ask me for a key. |
| Sign-in page does nothing | Paste the URL from Codex into the browser. Check that the codes match. |
| “Not enough credits” | Nothing finished generating. Add credits in the console, then ask Codex to try again. |
| Generation failed midway | Credits for a failed task are refunded automatically. Ask Codex to try again. |
| Files are not in your project | Tell Codex the exact folder, for example Save it in ./assets. |
| The result looks bad | Ask Codex to redo it. Do not keep regenerating in a silent loop. |
Related pages
- Tripo CLI — the same engine, used from the terminal
- Plugins — Unity, Blender, and other editors
- Authentication — API keys (you should not need this for Codex)
- Billing — how credits work